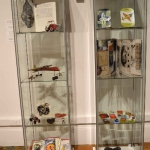
In my last post, I showed pictures of my fabric dyeing experiments in progress. Here are the pictures showing how the dyeing experiments turned out:
Compare the above photo to the one in my earlier post of what it looked like before washing out. The end result is much lighter than what it looked like when the dye was first applied. In this instance, I applied the fixative (soda ash) to the fabric before applying the dye and then covered the fabric with plastic to let the dye cure overnight. I was hoping to allow the dye ample time to cure and fix as much of it to the fabric as possible. This experiment is a good learning for me as far as understanding how much darker the dye/fabric looks while wet and how much lighter it will be once the dye is set and the fabric rinsed out. I like the different kinds of marks that result from the various resists that I used, and I will continue to work on manipulating this piece of fabric into a finished image.
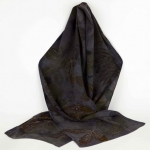
Next, here’s the result of the direct dye application experiment:
Compare this image to what this piece looked like when it was wet and the dye first applied to it. The “wet” image is harder to see, since it is under plastic, but it too was a bit darker when wet/before being rinsed out, but the change in color is not as drastic as in the above example. On this one, I added fixative to the fabric first again, but then also added some fixative to the dye paint as well and I think this helped the fabric absorb more of the dye color in this experiment. I used the same process of covering the fabric with plastic to keep moisture in while letting the dye cure over night, and actually for a couple of days before washing it out. So, I think the combination of a)adding fixative to the dye paint and b) letting it cure for 2 days both contributed to the fabric retaining more of the dye color than the first image above. I like the results of this piece of fabric too, and have some ideas about how I’m going to use this for a next piece in my Wall Drawing series.
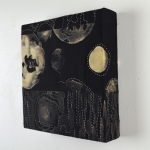
Of the 3 experiments, I’m really excited about my little 2 mile island resist dyeing results:
This involved first sewing the fabric into tubes and then applying the fixative and then wrapping the fabric around 2 PVC pipes and scrunching it down and holding it scrunched down with rubber bands. Then I painted dye on the fabric and then let it soak in dye solution for a couple days. Since the dye bath wasn’t deep enough to cover the whole piece of fabric, I also occasionally returned and re-applied more dye on the whole pieces of fabric. I really like how these turned out – they (and this technique) will be perfect to use in making more of my triathlon swim start textile paintings. I especially love the lack of control of the results and that it’s done completely with physical resists…something about that really appeals to me on a physical level.
A Bonus
One more picture to share. Here’s my sweet little brown girl Emma (I also call her “Boo” for short)! She’s an almost 5 year old Chessie/Lab mix rescue puppy that I’ve had since she was 9 weeks old.
She’s my helper and my buddy and keeps a close watch on me while I’m in my studio. Mostly she’s just happy all the time (especially if there’s a ball or sock nearby), which makes me happy too and always brings my attention back to the moment and what’s important in life. I learn a lot from her. Some day I’ll probably write a post about that.
How bout you? Have you learned any bits of wisdom from your beloved animal friends? I’d love to hear about it in the comments below if you’d like to share.


Emma! Love seeing her. Ayn, Wow! LOVE those scrunched up ones, as well.
And I love the web on top. It seems so much like printmaking, which makes it all related to your strengths!